
When you’re ready for outdoor roasting some slow cooking meats, step up to using a Weber Kettle with rotisserie. This is a listed in Food Equipment & Tools and Grilling categories and is is shown in our “Complete Guide to Grilling on Charcoal“.
Introduction To The Weber Kettle With Rotisserie
Everyone loves the results when grill with a rotisserie. It’s a bit to setup on the grill but, everyone can do it whether it’s by charcoal, gas, or pellets. Keep reading to see the easiest way to be grilling with rotisserie.
Slow Roasting in Covered Weber Grill with Rotisserie
What’s the Difference Between Cooking on a SPIT or a ROTISSERIE?
First, these are 2 words that are thought be the same but are not. Grilling on a Spit and Grilling on a Rotisserie are related but different. A Spit is basically a rod that runs through the meat to hold it up over fire while cooking it. A Rotisserie is a rotating rod of meat roasting over the fire, i.e., a rotating spit. Here, WikiDiff explains the meanings of Spit and Rotisserie in more detail.
Charcoal and The Weber Kettle With Rotisserie
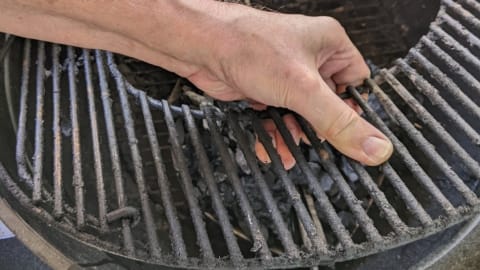
When you’re cooking on a charcoal BBQ and rotisserie equipment, you’ll need to know how to keep your coals hot for hours. So, here’s our article on “How To Keep A Weber Charcoal Grill Hot” while grilling or smoking on a charcoal grill for long periods of time like when using a rotisserie.
While you can’t beat the taste of meat on a rotisserie over a hot charcoal grill, you can choose to use lump charcoal, instead of briquettes, for that maximum flavor. Read more about charcoal briquettes compared to lump charcoal.

Weber Rotisserie Attachment
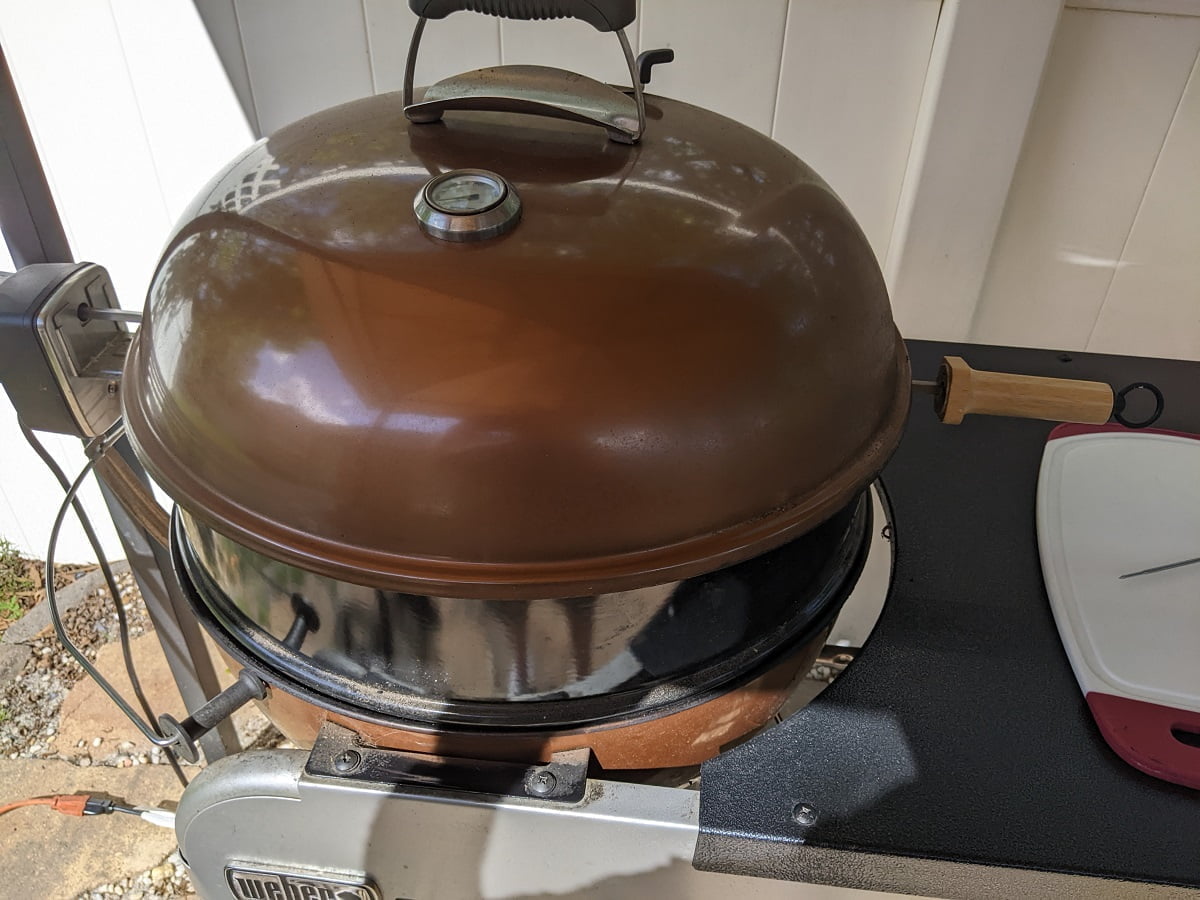
When using a charcoal grill, a popular one is a Weber with rotisserie. Weber makes a rotisserie kit that can be added to all kinds of Weber grills. I use the most common, which is a 22-inch grill, matched with a 22-inch rotisserie bundle kit.
Components of the Weber Kettle with Rotisserie Kit
The Weber rotisserie attachment comes with several components that work together to create a perfect rotisserie spit unit on a charcoal grill. The rotisserie attachment lays on top of the grill’s border where you can plug it in and turn it on to rotate your meat while it roasts over the hot coals. It works with the grill cover on or off. Keep reading to see about the parts and how to set it up.

Setup Weber Kettle With Rotisserie Kit
Here are some step-by-step procedures to perform the complete Weber rotisserie set up. Lay out the rotisserie parts. Then get your grill ready to light and meat ready to cook. Here are the detailed steps for the full Weber rotisserie set up.
Prepare The Grill & Rotisserie Ring
Step 1. Prep the grill, charcoal, drip pan, rotisserie, and meat
- Ensure grill venting is open.
- Remove the grill lid.
- Remove the top cooking grate
- Prep the charcoal for lighting.
- Have an electrical cord and power source ready for the rotisserie motor, as needed.
- Lay out the rotisserie components, an empty drip pan, and cold tap water (6-8 cups) at the grill area.
- Prep the meat to be ready for cooking.
Step 2. Light Charcoal; when hot, take meat to grill area.
- Now, light the charcoal for the 2 charcoal bins in your usual way.
- After the charcoal is all hot, take meat to the grill area.
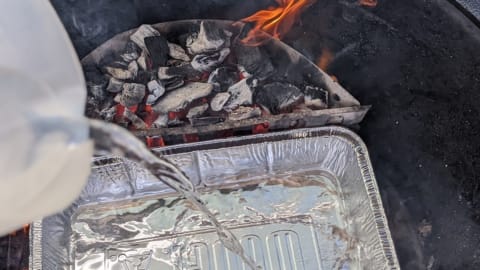
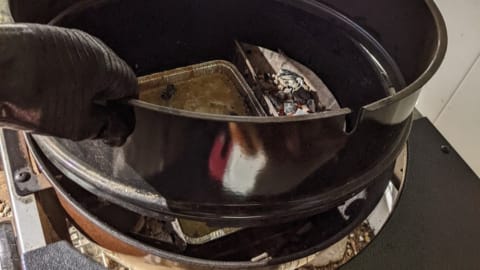
Step 3. Position hot charcoal & drip pan. Add water to pan.
- Position the 2 charcoal bins on opposite sides of each other and ensure they’re full of the hot charcoal.
- Lay an empty foil drip pan in the center of the grill. There will be a hot charcoal bin along each of the long sides of the pan.
- Pour the cold tap water into the drip pan.
Step 4. Place Rotisserie Ring on hot Grill.
- Lay the large rotisserie ring on top of the grill’s bordering edge. You’ll want it so that the resting slot for the rotisserie rod will make the spit rod later be parallel to the long sides of the drip pan. Also, ensure it’s stable and won’t fall off.
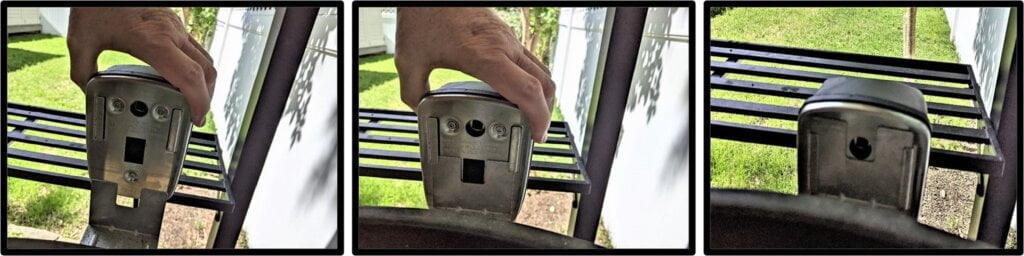
Step 5. Slide Rotisserie Motor into place carefully on Ring.
- Carefully, slide on the rotisserie motor by its mounting clip. Still be careful not to let the large ring fall off the grill’s edge.
Load The Meat & Mount The Rotisserie
Step 6. Load up Rotisserie Spit (Rod) with Meat.
- Now, you’ll load up the rotisserie rod with the meat.
- Take the pointed rotisserie rod, i.e., the spit, remove its protective tip, and insert one of the rotisserie forks on it (prongs facing away from the handle). Estimate where it needs to be for ensuring meat to be in center later, and tighten it.
- Then, add all the meat pierced through the rod. Ensure it’s inserted into those initial rotisserie fork prongs. Review it for the meat being centered on the rod and adjust the fork prongs, as needed, and re-tighten.
- After adding and centering all meat on the spit, slide on the 2nd rotisserie fork (prongs facing the meat), piercing into that end of the meat. Secure all meat well and tighten the 2nd rotisserie fork.
Step 7. Insert Loaded Rotisserie Rod on Ring and Turn ON Rotisserie Motor!
- Now, carefully insert the rotisserie rod pointed tip through the ring’s opening and into the mounted motor’s port. Then, lower the other end (the handle’s end) onto the ring’s cutout slot. It’s very important to be careful. This is over high heat. The rotisserie ring is just resting on the grill’s edge while you’re adding a moving weight onto it. After everything’s in place, slightly ensure you’ve settled the ring in place and it won’t slip off.
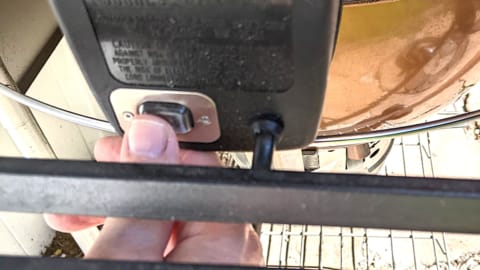
- Now, you can plugin the rotisserie motor and turn it on.
- After ensuring it’s turning the meat properly, you can now cover the grill’s rotisserie ring with the grill lid and open the grill lid’s vent.
- Set your timer, as needed, for adding more charcoal periodically.
Step 8. Turn on Rotisserie Motor and set a timer.
Weber Rotisserie Parts
The Weber Rotisserie Parts are described here. And they are available as replacement parts if needed. You want to be careful if not ordering from Weber to ensure they will work well for you.
Weber Rotisserie Bracket
The rotisserie bracket is extremely important to ensure it’s fully secured for carrying the weight of the motor and a meat loaded spit (rod). The manufacturer permanently mounted the bracket onto the rotisserie ring. For its practical usage, when you’re ready to install the motor for cooking, you can just slide the rotisserie motor onto its mounted slot.
You want to ensure the mounting’s slotted sides don’t get smashed or bent during usage and storage. If damaged, you can get a replacement part from Weber or resellers.

Weber Rotisserie Forks
The stainless steel Weber Rotisserie Forks are the 2 items that secure the meat onto the rod. That’s because they have a mounting thumb bolt that locks them in place after sliding them into position. You’ll want to ensure these forks are cleaned thoroughly after each use. Then, they slide on and off easily. And also, so they don’t get food remnants left on them.
They shouldn’t go into a dishwasher, but you can soak and hand wash them when needed. Also, Weber or resellers carry them as a set of replacement parts.

Weber Rotisserie Ring
The Weber Rotisserie Ring is the largest component of the rotisserie bundle kit. Fortunately, it’s a fairly good solid metal ring for raising the rotisserie rod full of meat to be well off the hot charcoal. However, it can be an issue for storage because of its vast size. Wherever you decide to store yours, it’s important for both you and it to not get bent out of shape.
The design is such that it needs to remain reasonably a true round shape and match the same true roundness of the grill kettle’s top edging perimeter. It doesn’t have any mounting clips, so the roundness is crucial for its resting lip for supporting a heavy rod of meat when in use.

Tips Using the Weber Kettle with Rotisserie
Here are some expert tips using a rotisserie on a BBQ grill. Roasting on a Weber charcoal grill with rotisserie is a bit of extra work to set up, manage during cooking, and preparing for the next grilling session. Therefore, these tips using a rotisserie on a BBQ grill should help make rotisserie roasting tasks much easier.
Planning To Use the Weber Kettle with Rotisserie
Planning for cooking can on the Weber Kettle with Rotisserie and Racks save a ton of time and frustration. Just review the earlier step-by-step process for setup and you’ll get into an orderly habit for all types of grilling. First, ensure you have all the groceries for your meats and sides at least the day before the cookout. But that also includes any charcoal and fuel you might get ready to use. Then, as the steps conveyed, lay out all your rotisserie components, drip pan, and water, you’re ready.
The final key is also to finish out the grilling session by cleaning up the parts used. If you do it within a couple of hours after finishing cooking, they should all clean up rather well for returning to their storage spot. And yes, soaking the rotisserie forks will be very helpful. You don’t want to be tempted to run them through the dishwasher. I’ve seen many a stainless steel tool be fine on the main body, but the screw threads start rusting, making the part useless within a year.
Weber Rotisserie Max Weight
There’s a maximum weight for each Weber kettle with rotisserie kit. The popular 22-inch Weber rotisserie max weight is 20 pounds. Weber stated that all of their rotisseries can handle up to 20 pounds, except their rotisserie smaller rotisserie part number 7659, which can take up to 10 pounds.
Centering the Meat over Drip Pan
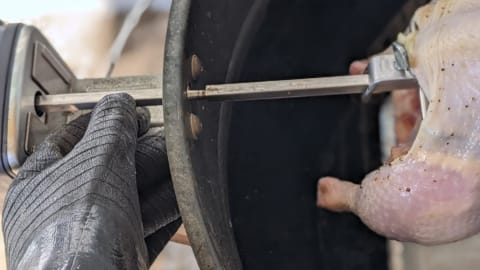
Centering the meat over drip pan is important for ensuring drippings will not fall into the grill kettle. A tip for knowing how to do that is beneficial. This is so you’re not installing the spit over hot coals and having to remove it to readjust the rotisserie forks, and then try again.
So, while inserting the meat, observe there are 2 notches in the rod, one on each end. Use this as your perfect guide and center the meat evenly between these 2 notches. Now, assuming your drip pan is centered in the kettle, your meat will now also be centered over the pan.
Notch on pointed end of spit rod

If all your loaded meat extends longer than the longest length of your drip pan, your meat will be extending past your drip pan on both sides. So, the solution is to add a 2nd drip pan, if it will fit. If not, you can makeshift some foil and shape them like little drip pans to place on each end of the main pan. You won’t need to add any water into those end pans, since the major asset is the central pan that has water.
Rotisserie Accessories
There are just a few Weber kettle with rotisserie accessories you’ll want to strongly consider having. One of the most important is to have some long arm, heat resistant barbecue gloves. I always use them when hanging the meat loaded rotisserie rod over the hot coals. And they clean up after using with food just fine; however, not before this photo was taken. Lol.

The second item I use is a barbecue grill grate gripper. It’s kind of like a special shaped set of pliers just for grilling. While I use it for gripping and lifting grill grates, I also use it for gripping to move the hot Weber charcoal bins around to different positions.

Weber foil drip pans are great. They come as a stack of them and I just store them with the rotisserie equipment. They fit perfectly in the middle in between both charcoal bins.
Rotisserie Recipe Ideas
Thinking about the BBQ and rotisserie of what to cook brings up some rotisserie recipe ideas. So, plan and stock the freezer with some of these extremely popular meat items for the rotisserie. Also, you can get a cheap, massively large pork roast to put on the rotisserie for 4-6 hours and have pulled pork. That will be good for a main course or for pulled pork sandwiches.
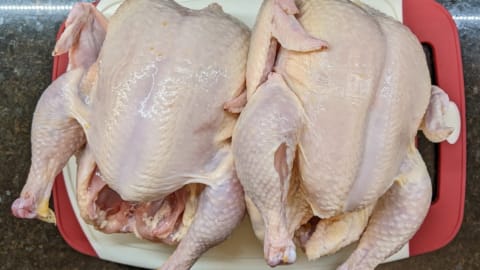
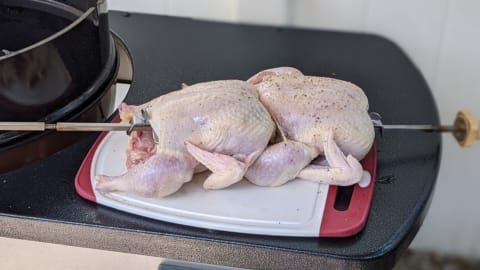
Another real popular simple choice is to put on the rotisserie a couple of whole chickens. I’ve done it with just one, but it’s much easier if you roast at least 2 together.

You can also do a prime rib, a ham, and the ultimate turkey. But be aware of the weight limits for loading up your Weber kettle with rotisserie.
Conclusion
Now that you’ve seen all that’s involved in using your Weber kettle with rotisserie, take the next step and plan on it. So, go ahead and add the meats to your grocery list and get that rotisserie kit ready. And don’t forget to get extra charcoal. It’s one of the few grilling items you don’t have to tend to, other than adding more charcoal periodically. So, if you’ve cooked on a rotisserie, let me know what you made and how you did it so it can be shared with other readers here!