This is a complete guide of how to make pizza dough in bread machine at home. It’s EASY and FAST using just the “dough” setting. This is part of our Homemade Pizzas in Oven Guide and our Bakery, Bread, Italian Cuisine, Bread Machine Recipes, Main Dishes, & Pizzas Categories.
Bread Machine Pizza Dough Recipe
Equipment
- 1 Bread maker
Recipe Resizer
Tap to change Ingredients Size or Nbr of Servings
Ingredients
- 1 cup water warm from tap
- 2 Tablespoons olive oil or other vegetable oil
- 1 Tablespoon sugar
- 1 teaspoon salt
- 2 cups bread flour or all-purpose flour
- 2 Tablespoon Vital Wheat Gluten optional for extra chewiness
- ½ teaspoon garlic powder optional
- ½ teaspoon instant yeast can be quick rising, instant, or bread maker yeast
Instructions
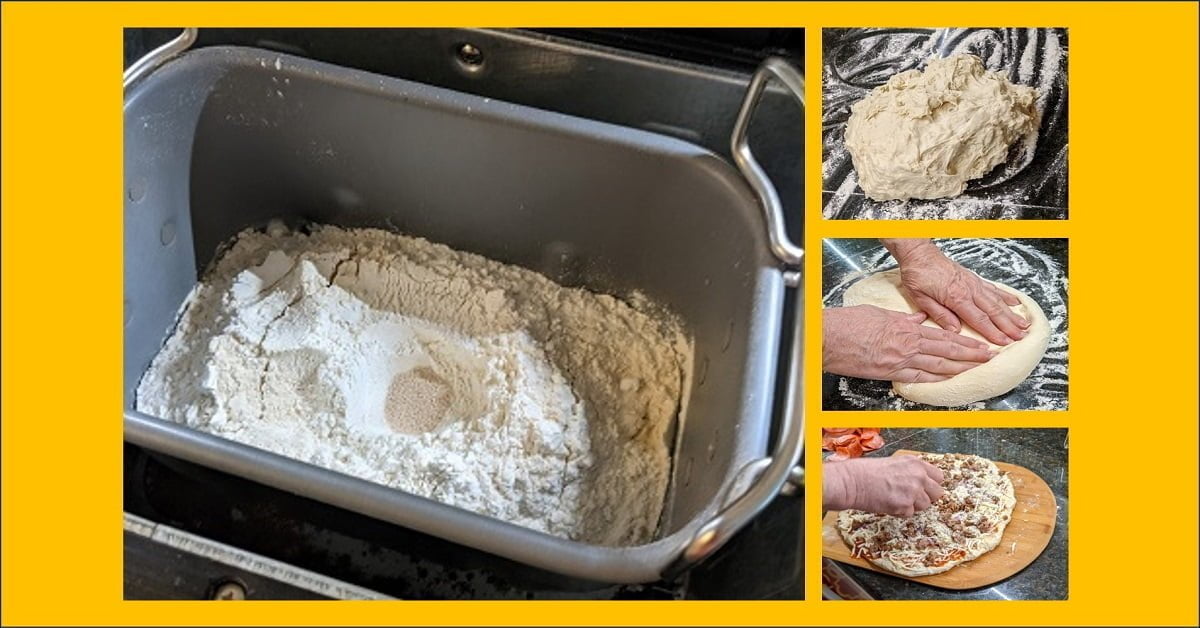
- Make Pizza Dough Using Bread MachineIn the bread maker, add in the ingredients, in order, as shown. Wet ingredients go in first. Yeast goes in last and should be in a central crater made in the flour.
- Start Bread Machine To Make Pizza DoughUse the "dough" setting of your bread maker and press button to Start. For Zojirushi brands, it is course number 11 and takes a little under 2 hours for processing Storage Option: You have the option of storing the dough in the fridge or freezer when process is completed. Otherwise, continue to the next steps for shaping the pizza dough for immediate usage.
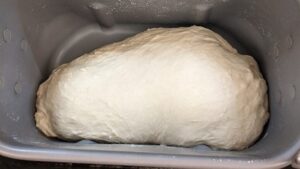
- Shape into a Dough BallWhen dough process completed, remove it and place it onto a heavily floured surface. Move the dough around to coat all of it in the flour.
- Shape the Pizza Dough Ready-To-UseYou can now either roll it out, press it out by hand (intermediate), or (advanced) stretch it out by lifting and turning while stretching (or draping and manipulating it across the backs of your hands). Here are some details on shaping the pizza dough.You can switch between using your hands to using a rolling pin at any time. Using your hands, from the center, press down and outward as if you're collapsing excess air bubbles from the dough. Rotate the dough and continue repeating this process. At times, turn the dough over. Another way is to use one hand to hold down the center, and use the other hand to lift and stretch away an outer area. Repeat this many times as you rotate and occasionally turn over the dough. Also, use the rolling pin when desired, until you have the desired size and shape to match a fit to your pizza pan, baking sheet, stone, or steel.Your pizza dough recipe is done! Follow any pizza recipe that calls for pizza dough.
Notes
For medium or thick crust, increase the yeast by 50% more.
Nutrition
Master the Art of Pizza Dough in Bread Machine Recipe
If you’re looking for an alternate recipe, here is a homemade recipe from scratch and by hand without a bread maker.

Easy Pizza Dough In Bread Machine
Mastering easy pizza dough in bread machine methods is simple with the right ingredients at the right amounts. You’re freed up from having to set multiple reminders for the yeast activation, covering the dough, moving it into a bowl for resting, and so on. You can use this time to prepare your pizza toppings (or going to the store to get them!).
You also save money and you get to control the ingredients for improving nutritional values, flavor, and texture.
Ingredients for Pizza Dough in Bread Machine
All you need is flour, yeast, salt, sugar, oil, and water. Anything else is optional.
How to use a bread machine to make pizza dough
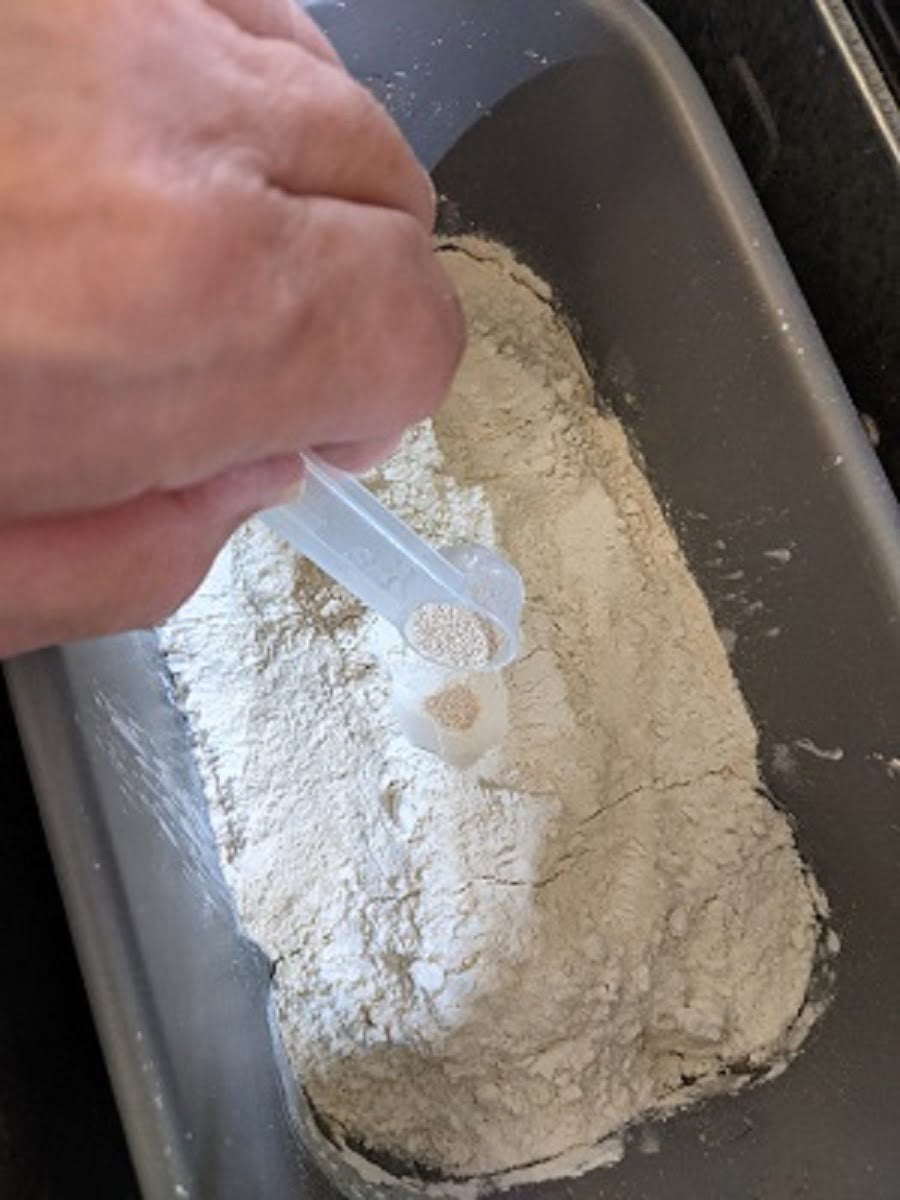
Adding yeast into a flour crater as final step to start the pizza dough in bread machine dough process.
This recipe guides you with details of how to use a bread machine to make pizza dough. In Summary, you add the ingredients to the bread machine, set it to the dough cycle, let it run, Roll it out when it’s completed. How’s that for a summary of steps? In reality though, there’s a bit of experience that also comes with shaping the pizza dough after you’ve done it several times.
Pizza Dough in Bread Machine Thin Crust
There are three key techniques to having pizza dough in bread machine for a thin crust. Here they are.
- First, very specifically, follow the recommended amount on this recipe for the yeast. It’s just a small amount and less than a packet. It has been tested repeatedly in order to be able to produce either a thin crust or a medium crust. To have it thin or medium, you control it next by how thick you have created the final, shaped dough.
- Second, in order to have a thin crust (after you’ve shaped it into a thin dough), ensure you do not par bake it. That one was easy!
- Third, as soon as your dough has been shaped thin, proceed immediately with the sauce and toppings, and put it into the oven. No waiting whatsoever! As soon as you stopping shaping the dough, it will slowly but surely begin to rise so, you’ll want to execute these final steps quickly. If you discover you’ve had a little delay before putting on the sauce and toppings, you can easily press or roll the dough one last time to expel any air that might have caused any rising. Problem solved!

Pizza dough bread machine recipe 2 lb
As this recipe makes about 1 pound, you can still produce the pizza dough bread machine recipe 2 lb. Just tap the “Recipe Resizer” to double the recipe size.
Zojirushi bread maker pizza dough
While any bread maker can be used, this recipe uses the example for Zojirushi bread maker pizza dough. And the course number for the dough to use is 11, as mentioned in the recipe instructions. All bread makers that have their own dough setting can follow this recipe. Also, as a reminder, ensure your Zojirushi bread maker paddles, if you have 2 paddles, are aligned before adding the ingredients.
Storing Pizza Dough
Can you pre make pizza dough?
Yes! You can then store it in a food plastic bag in the fridge for up to a few days or the freezer for a few months. See the recipe notes for details.
How to pre make pizza dough and then store it
The recipe will tell you when to stop and store it, if that’s your plan. Basically, you can pre make pizza dough up to the point the bread machine is done with the dough making process. It will be kind of sticky but it works fine and stores well. It will store best in the fridge if you coat the dough with some olive oil but that’s optional. At least expel all the air from the food storage bag if you’re not going to use it the same day.
Bake Pizza Dough
Prebake Pizza Dough or Not
I used to par-bake the pizza dough first for about 7-8 minutes at 450°F. Over time, I found that to be too long so I tested several times and found 5 minutes to be ideal. It definitely helps in making the rest of the pizza much easier and for slipping the fully topped pizza back into the oven. Par baking does still taste good and better than store bought pizzas. It’s not quite as good a restaurant pizzas though.
My issue with par baking became that it would cause the dough to rise more than I wanted, especially for those times I wanted it to remain as a very thin crust. After par-baking pizza dough for about a year, I now only do this when I want to have some pizza dough ready for pulling out and making pizza very quick. It does taste a lot better if I don’t par bake it, I’ve discovered.
Primarily, I rarely par bake now and changed to making the pizzas the way the Italians often do. I had noticed (in videos) they always were spreading the sauce onto raw pizza dough, not par-baked dough. So, I changed and went that direction. I discovered the pizza dough tastes significantly better in the texture and I can make it thinner if I want. However, on the con side, it was harder to make the final pizza transfer process into the oven.
This is an art and you have to have the right tools for this, if you’re going to stop making pizzas in a pizza pan eventually. So, if you do decide to get a pizza stone (or pizza steel), I recommend you also get a fairly good pizza peel. That’s another subject altogether.
What is par baked pizza crust?
It is partially baked pizza dough. This is when the dough is only briefly baked with no sauce and no toppings. The purpose is for having it quickly ready for adding the sauce and toppings and popping it into the oven for faster homemade pizza planning.
Can you prebake pizza crust?
Yes. It’s referred as “par baking” pizza dough. That means you only partially bake it. In summary, you make your pizza dough and bake it (no sauce, no toppings) at 450°F for about 5 minutes. It probably won’t be browned, which is perfectly fine. You can then store it in the fridge or freezer in a good plastic food bag. Or, you can use it to then top the pizza and finalize the cooking.
How long to par bake pizza dough?
You par bake pizza dough for 5 minutes at 450°F. Some will do it for a little longer or a little shorter. I’ve worked with this specific testing for over a year and have found this is the optimal time and temperature for maximizing both flavor and texture retention. Your oven temp and altitude may alter your results but this should be a great starting point for everyone.
Nutrition of Pizza Dough in Bread Machine
Healthline reports that Pizza sold in fast or convenient outlets are among the unhealthiest. So, making your own gives you the final options to manage what goes into it. The nutritional values are shown in the <Print Recipe> option.
Conclusion of How To Make Pizza Dough in Bread Machine
In conclusion, when you make pizza dough in bread machine recipes, you’ll discover you save a ton of time. You discovered the easy steps of adding all your ingredients into the bread maker, pushing <Start> and returning in 2 hours to roll it out. Your homemade pizza dough is ready to use for pizza night. You’ve also seen many options of storing it in the fridge or freezer. And you can par bake it for also storing or immediate usage. Either way, this is the excellent path for many methods and tips for making your own flavorful, homemade pizza dough.
So, what are you waiting for? A complete list of pizza recipes and steps of how to make homemade pizzas are available in our “Homemade Pizzas in the Oven” Guide.
- Check out how to make cast iron skillet pizzas
- Also, you can use this recipe to make Calzone using pizza dough!
- Learn how to clean your pizza steel after baking pizza
2 comments
zoritoler imol
I have been surfing on-line more than three hours looking for what I think is the best pizza dough recipe using a bread maker. Thanks!!!
Sotlar
Tremendous things here on pizza dough. I was glad to see the easiest way to make it in a bread maker. This saves a ton of time and is convenient.